PickRV Mega Guide
Winter RV survival — heating, plumbing freeze prevention, and snow driving
RV systems weren't built for hard freeze. Heated tanks, RV antifreeze in pipes, propane heating math, and the snowstorm rules that save…
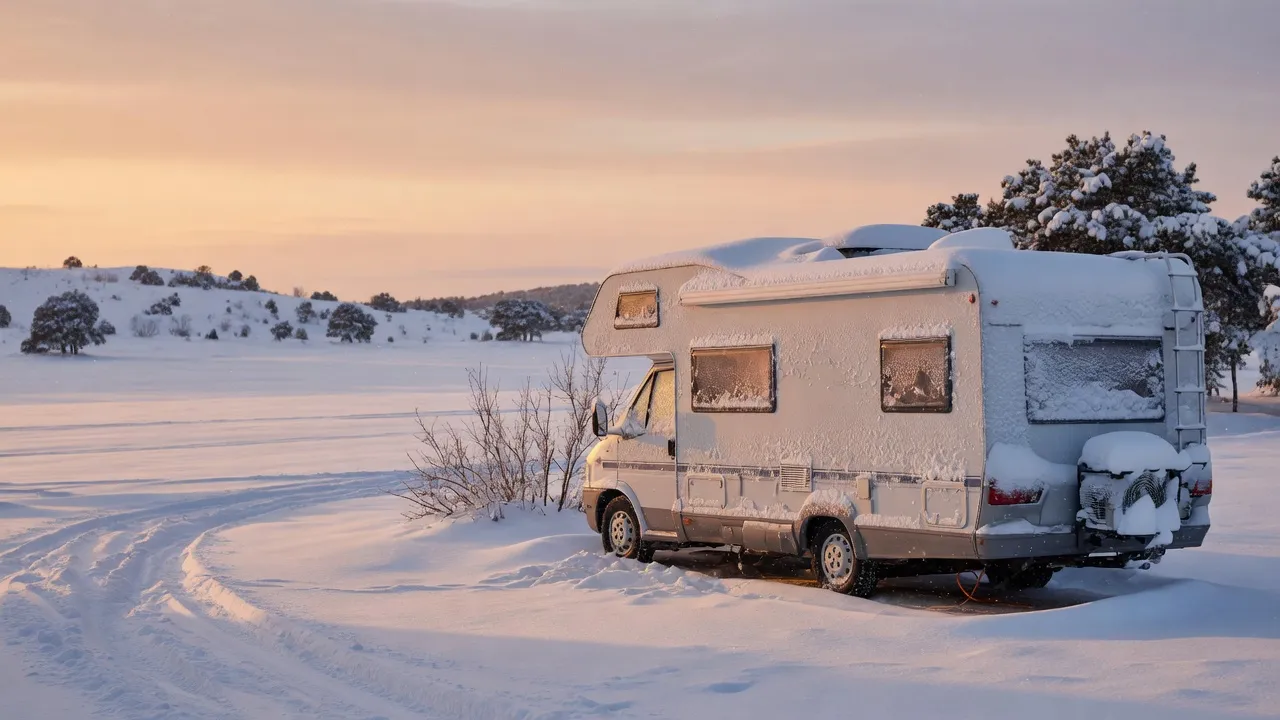
Winter RVing — especially below 25°F — is a different sport. RV plumbing, holding tanks, and waste lines run UNDER the rig with minimal insulation; freeze them and you crack pipes (cheap fix) or split holding tanks (expensive). Heating systems run on propane that consumes faster in cold, generators struggle to start, and tire pressure drops 4-6 PSI for every 10°F. This guide walks through plumbing freeze-prevention (skirting, heat tape, pink antifreeze), generator + propane math in cold, and the snow-driving rules that prevent slide-offs.
PickRV
Published by PickRV
PickRV is a marketplace. Editorial content is informational only — confirm road status, weather, wildlife, and host policies before you travel.
What does the PickRV winter rv survival guide cover?
RV systems weren't built for hard freeze. Heated tanks, RV antifreeze in pipes, propane heating math, and the snowstorm rules that save your trip. We walk through it section by section — what to check, what it costs, and the details most listings leave out.
- What freezes first
- Winterizing
- RV skirting
- Propane consumption in cold
- Snow + ice driving
- Tank heating

Overview · ≈1 min
What freezes first — the cold-weather failure cascade
RV systems freeze in a predictable order: (1) exterior hookup hoses, (2) low-point drains, (3) belly-pan plumbing, (4) holding tanks, (5) interior plumbing if heat fails. At 25°F sustained for 6+ hours, exterior hoses freeze. At 15°F sustained for 24 hours, belly-pan plumbing freezes. Below 10°F sustained, holding tanks freeze. Cracking happens at ~28°F because water expands 9% when freezing — the WEAKEST joint splits first.
PickRV editor · what manufacturers + manuals gloss over
Manufacturer brochures advertise '4-season insulation' on every premium rig. Reality: 'arctic package' usually means double-pane windows + enclosed underbelly with rudimentary heating ducts to the tank area. It does NOT mean rated to -20°F. Most 'arctic-rated' rigs still freeze hard at 10°F if exposed for 24+ hours. The single biggest myth: 'I'll leave the propane heater on, that'll keep everything from freezing.' Propane furnace pushes warm air through the INTERIOR — the belly pan + tanks are below the floor, often unheated except by tiny ducting that only works above ~25°F outside. Below 25°F, supplemental heat (heat tape on pipes, electric tank heaters) is required.
- Failure cascade: hoses → low-points → belly-pan → tanks → interior
- 28°F is where freezing starts; 10°F is where tanks split
- 'Arctic-rated' rigs still need supplemental heat below 20°F
Chapter 2 · How-to · 6 steps · ≈1 min
Winterizing — pink antifreeze cycle, step by step

Winterizing prepares an RV to sit in freezing weather without damage. The standard method: drain all fresh water, blow lines with compressed air (optional), then pump RV-grade pink antifreeze through every line. Takes 30-60 min for first-timers. Skipping it = $500-$3,000 in pipe + tank repairs come spring.
- 1
Drain fresh water tank + all holding tanks
Open all drains (low-point + tank dumps). Run water pump empty until it dry-cycles. Pull the water heater drain plug; bypass valve to OFF (so antifreeze doesn't fill heater).
- 2
Blow compressed air through lines (optional)
Connect 30-40 PSI compressor to city water inlet. Open each faucet (hot + cold) until air-only. This evicts most water before antifreeze.
- 3
Connect antifreeze pickup hose
Most RVs have a winterize switch on the water pump — flip it. Drop the included pickup hose into a 1-gal RV antifreeze jug. Turn pump ON.
- 4
Open each faucet hot then cold until pink
Start at the kitchen sink hot, run until pink antifreeze flows. Repeat cold. Then bathroom, shower, exterior shower. Toilet: flush a few cups until pink.
- 5
Pour 1 cup antifreeze in each drain trap
P-traps under sinks + shower drain. Otherwise water in traps freezes + cracks the drain piping. Toilet: pour 1 cup into bowl + flush.
- 6
Label everything + take photos
Spring de-winterize forgets which valves to reopen + reset. Photo each valve position + tape a note on the bypass.
PickRV editor
Most rentals will arrive winterized in fall — RENTERS need to know this. If you rent in cold weather, ask explicitly: 'Is the rig winterized? Can I use the kitchen sink for water?' Often the answer is no. Bring jugs.
Second: '1 gal antifreeze' is the bare minimum; 2 gallons covers larger rigs comfortably.
Third: PINK RV-grade antifreeze ONLY. Never automotive (toxic). Never homemade vodka mixtures (the 'cheap' trick — actually dilutes water + freezes at 10-15°F, not -50°F like real antifreeze).
Comparison · 4 options · ≈1 min
RV skirting — the boundary against belly-pan freeze
Skirting is a barrier around the bottom of the RV — between the rig and the ground — that traps warmer air below the floor. Without skirting, wind blows directly under the rig, freezing tanks and plumbing even when the interior is heated. Effective skirting can keep tanks from freezing in temps 10-15°F BELOW the rig's nominal cold rating.
Skirting type comparison
Vinyl panels (AirSkirts, EZ Snap)
$1,200-$2,500
custom-fitted to rig. Quick install/remove (30 min). Best for snowbirds who stay weeks at a destination. Works well to 0°F.
Foam board (DIY)
$200-$400
in materials. Cut 1" rigid foam boards to fit gaps. Permanent feel — best for stationary winter use. Tape seams with foil tape. Works to -10°F.
Hay bales / snow banks (frontier method)
$0-$100
Stack hay bales or pile shoveled snow against the rig sides. Crude but effective for emergencies. Risks: rodents in hay; melts in late spring.
Bubble wrap + tarp (cheap travel solution)
$50
Layer of bubble wrap directly on rig walls + tarp wrap around it. Best for emergency cold snaps en route.
| Option | Cost | What it covers |
|---|---|---|
| Vinyl panels (AirSkirts, EZ Snap) | $1,200-$2,500 | custom-fitted to rig. Quick install/remove (30 min). Best for snowbirds who stay weeks at a destination. Works well to 0°F. |
| Foam board (DIY) | $200-$400 | in materials. Cut 1" rigid foam boards to fit gaps. Permanent feel — best for stationary winter use. Tape seams with foil tape. Works to -10°F. |
| Hay bales / snow banks (frontier method) | $0-$100 | Stack hay bales or pile shoveled snow against the rig sides. Crude but effective for emergencies. Risks: rodents in hay; melts in late spring. |
| Bubble wrap + tarp (cheap travel solution) | $50 | Layer of bubble wrap directly on rig walls + tarp wrap around it. Best for emergency cold snaps en route. |
PickRV editor
Skirting prevents 80% of winter RV plumbing damage. The biggest skip is the FRONT of the rig — most kits cover all 4 sides, but DIY-ers often skip the awkward front around the hitch. That's where 70% of belly-pan air infiltration happens. Cover the front (foam board + duct tape for the hitch area) even if you skip a side.
Second: adding a 60W ceramic heater INSIDE the skirted area at one end of the rig raises belly temp another 20-30°F. Cost: $25 heater + $50 in extension cord + plug-in timer. Stops tank freezes at -15°F if rig is otherwise warm.
Chapter 4 · Overview · ≈1 min
Propane consumption in cold — the math snowbirds miss
RV furnaces burn propane at 25,000-40,000 BTU/hr depending on size. A 30-lb DOT tank holds ~640,000 BTU. At 30K BTU/hr running, that's ~21 hours of continuous burn — but real-world cycling means 30-40 hours of cold-weather coverage per tank. In 20°F weather, a Class C burns through a 30-lb tank in 5-7 days; in 0°F weather, in 3-4 days.
PickRV editor
Salespeople quote 'gas furnace' specs but don't help you plan refill stops. Practical rule: in winter RVing below 30°F, ALWAYS have 2 full tanks + know your refill location BEFORE you start the heater. U-Haul, Tractor Supply, AmeriGas are the cheapest refill networks.
Second: 'propane gauge' on the rig is usually unreliable — the float-style sensors stick + read full when empty (or vice versa). Carry a digital weight scale OR a magnet-strip gauge ($10 on Amazon).
Third: 'Buddy heater' portables (Mr. Buddy, $85) are great supplemental heat but produce indoor CO + moisture — crack a window 2 inches when running. Don't fall asleep with one running indoors.
- 30K BTU furnace burns ~30-40 hours per 30-lb tank with cycling
- 20°F = 5-7 days/tank; 0°F = 3-4 days/tank
- Always 2 tanks minimum + know refill stops
- Float gauges lie; weigh or use magnet-strip gauge

Troubleshooting · 5 steps · ≈1 min
Snow + ice driving — the RV rules
RVs handle worse than cars in snow: high center of gravity, less weight per tire over the drive axle, longer braking distance. The combination causes 80% of winter RV accidents.
- 1
Symptom: rear of rig fishtails on light snow
Light loading in the back. Distribute weight evenly OR add 100-200 lb in the rear storage. Many Class B/C campervans benefit from sandbags in winter.
- 2
Symptom: braking distance feels MUCH longer
Switch to engine braking (gear-down). Use trailer brakes earlier than truck brakes if towing. Plan stops 2-3x earlier than normal.
- 3
Symptom: can't get traction starting from a stop
Carry a bag of sand or kitty litter. Put 2-3 cups in front of the drive tires when stuck. Tire chains are required on some passes (CalTrans chains in CA, Donner Pass).
- 4
Symptom: windshield wipers freeze
RV-specific de-icing wiper fluid (rated -25°F) — keep a bottle in the rig at all times. Regular blue washer fluid freezes solid at 25°F.
- 5
Symptom: door / step / vent frozen shut
Hair dryer + 10ft extension cord. Or use a propane-fired Mr. Buddy on LOW. Don't force a frozen RV step — you'll snap the motor.
PickRV editor
Truck stops + interstate scales become the de-facto highway plows in cold weather. Slip into a Pilot/Flying J for 1-2 hours to warm up the rig + interior before highway driving. Drive WITH the headlights on AT ALL TIMES — visibility in snowstorm is reduced; you want oncoming traffic to see you 200 ft sooner.
Second: 'snow-stuck-on-the-side-of-the-road' is the most common winter RV scenario. Carry an RV-specific third-party roadside membership that covers winter tows. Carry: shovel, sand/kitty litter, blankets, water, food for 48 hours, full propane tanks. Cell signal often dies on mountain passes; weather emergencies escalate fast.
Chapter 6 · Overview · ≈1 min
Tank heating — the actual fix below 15°F
Heat tape (electric resistance wire wrapped around pipes/tanks) is the standard tank-heating solution. Costs $30-$80 per tank installed. Powered by 120V shore power OR 12V via a converter. Critical for winter parks WITH electric hookups; for boondock winter, requires generator running 50% of the time.
PickRV editor
Heat tape comes in two flavors: 'self-regulating' (more expensive, won't overheat) and 'constant wattage' (cheaper but can melt plastic). Self-regulating ($60) is worth the upgrade.
Second: 'tank heater pads' ($45-$80) are flat heating panels that adhere to the bottom of holding tanks. Combined with heat tape on pipes, they keep liquids liquid down to -20°F.
Third: insurance perspective — water damage from frozen pipes inside the RV is COVERED by comprehensive insurance most of the time, BUT only if you've taken 'reasonable steps' to prevent freezing. Skip skirting + heat tape + leaving the rig unheated at -10°F = claim denied. Document your winter prep with photos.
Continue reading
More trips like this · 6
Similar terrain, seasons, and rigs from across PickRV.
Was this guide helpful?