PickRV Mega Guide
RV cooking mega-guide — the galley, propane vs induction, and 7-night meal plans
Cooking in an RV galley without losing your mind. Propane vs electric vs induction, batch-cooking that survives a moving kitchen, no-cook…
RV cooking is its own discipline. Tiny prep surface, dual-fuel stove that runs on propane in boondock + electric on shore power, 4-cubic-foot fridge that takes 6-8 hours to cool, and a sink that drains into a 30-gallon greywater tank you can't fill in one day. Cookbook recipes designed for a real kitchen fail in the galley; campfire cooking takes longer than most parents have patience for. The winning approach is a hybrid: batch-prep at home, use 1-pan dinners in the rig, lean on no-cook meals for lunch + breakfast, and respect the water budget. This guide walks through the galley overview, fuel-type comparison (propane vs electric vs induction), batch-cooking, the no-cook playbook, food storage when the fridge is small, and the dishwashing water budget.
PickRV
Published by PickRV
PickRV is a marketplace. Editorial content is informational only — confirm road status, weather, wildlife, and host policies before you travel.
What does the PickRV rv cooking guide cover?
Cooking in an RV galley without losing your mind. Propane vs electric vs induction, batch-cooking that survives a moving kitchen, no-cook meals, and the dish-water budget rules. We walk through it section by section — what to check, what it costs, and the details most listings leave out.
- RV galley anatomy
- Propane vs electric vs induction
- Batch cooking
- No-cook meals
- Food storage
- Dishes + water budget
Overview · ≈1 min
RV galley anatomy — what's there, what isn't
RV galleys (RV kitchens) typically include: 2-3 burner stove (propane standard, induction on luxury rigs), microwave, refrigerator (12V compressor, absorption, or residential), sink, and 12-24 inches of counter space. Notably MISSING from most galleys: dishwasher, large oven (most are 18-inch toaster-oven-size), garbage disposal, full pantry, and the counter real estate to roll out dough or fillet a fish. Plan recipes around what you have.
PickRV editor · what manufacturers + manuals gloss over
RV brochures show beautiful galley shots with food styled across the counter — the reality is you have 12 inches of counter to work with, and that 12 inches is also where the dirty dishes pile up. The fix: a $20 'cutting board sink cover' — a wooden board the size of one sink basin that gives you 12 extra inches of prep space when not actively washing.
Second: the RV oven is usually a propane-only unit (rare to find electric) — and the burner is at the BOTTOM of the cavity, so direct heat hits the bottom of the pan harder than the top. Cookies + biscuits burn on the bottom while still raw on top unless you use a baking stone + raise the rack.
Third: the microwave on most rigs is a small countertop unit (700-1000W) wired to 120V — works on shore power, generator, OR a 2,000W+ inverter, but NOT on battery+inverter under 1,500W.
Fourth: residential-fridge rigs (full-size kitchen-style fridge) are a luxury option in newer Class A + 5W — 16-22 cubic feet of food storage, but requires shore power or 400Ah+ lithium with 2,000W inverter for boondock.
- Galley counter = 12-24 inches — use a sink-cover cutting board for +12 inches
- RV ovens burn pan bottoms — use a baking stone + raise the rack
- Microwave needs shore power, generator, or 2000W+ inverter
- Residential-fridge rigs require 400Ah+ lithium for boondocking
Chapter 2 · Comparison · 4 options · ≈1 min
Propane vs electric vs induction — which stove for which trip

RV stoves come in three flavors: propane (standard, dual-fuel boondock-friendly), electric (rare, found on luxury or all-electric rigs), and induction (newer, energy-efficient, requires shore power or large inverter). The choice affects what you can cook + where you can cook + how much propane or power you burn.
RV stove fuel comparison
Propane (standard 2-3 burner)
Instant heat, works anywhere with propane, no shore power needed. Burner output: 7-12K BTU each — slightly weaker than home stoves. Burns ~1-2 lb propane per cooking hour. Standard on 95% of rigs.
Electric coil (rare in RVs)
Needs shore power or 2000W+ inverter. Slow heat-up (3-5 minutes per burner). Common on all-electric campervans. Drains 1-1.5 kWh per cooking hour.
Induction (luxury + new builds)
Faster than gas, requires ferrous cookware (cast iron, stainless steel — NOT aluminum or copper). 1,800W per burner peak. Shore power or large inverter. Energy-efficient (most efficient stove type).
Outdoor camp stove (Coleman, Camp Chef)
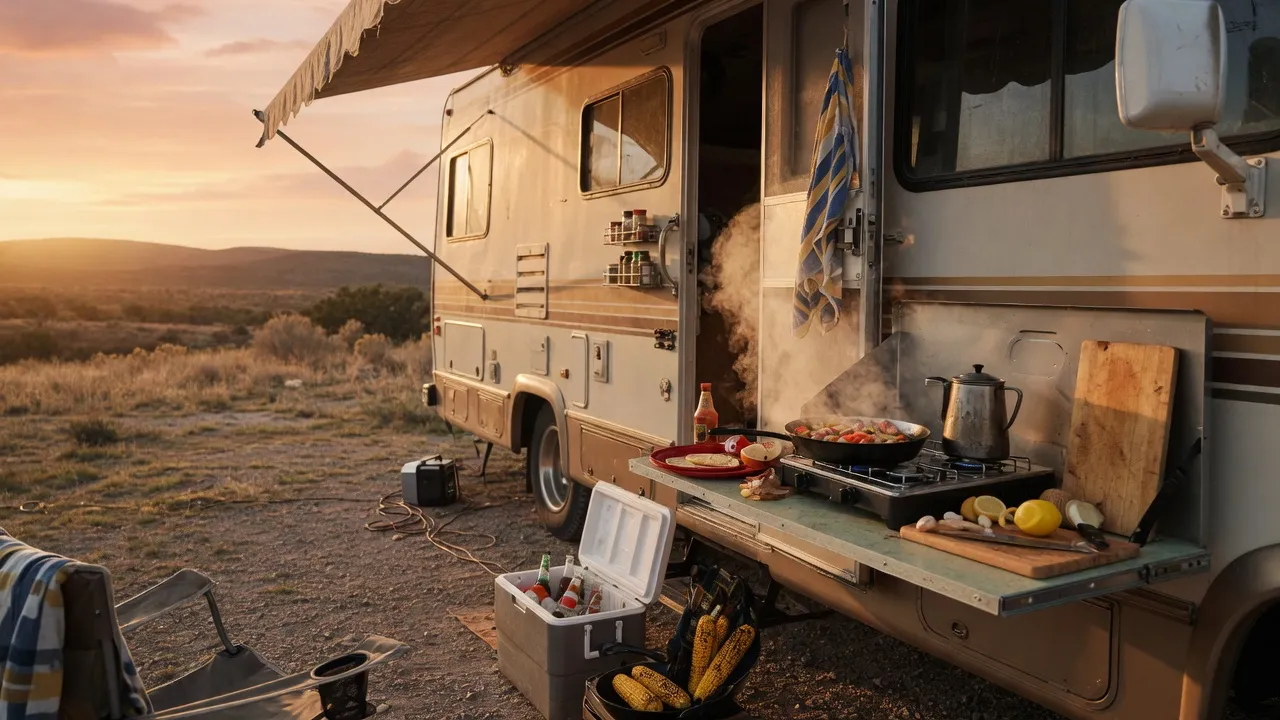
Bring your own. Propane bottle ($20 for stove + $10 for bottle). Used outside under awning to keep galley cool + ventilated. Many RVers prefer for high-smoke cooking (bacon, fish).
| Option | What it covers |
|---|---|
| Propane (standard 2-3 burner) | Instant heat, works anywhere with propane, no shore power needed. Burner output: 7-12K BTU each — slightly weaker than home stoves. Burns ~1-2 lb propane per cooking hour. Standard on 95% of rigs. |
| Electric coil (rare in RVs) | Needs shore power or 2000W+ inverter. Slow heat-up (3-5 minutes per burner). Common on all-electric campervans. Drains 1-1.5 kWh per cooking hour. |
| Induction (luxury + new builds) | Faster than gas, requires ferrous cookware (cast iron, stainless steel — NOT aluminum or copper). 1,800W per burner peak. Shore power or large inverter. Energy-efficient (most efficient stove type). |
| Outdoor camp stove (Coleman, Camp Chef) | Bring your own. Propane bottle ($20 for stove + $10 for bottle). Used outside under awning to keep galley cool + ventilated. Many RVers prefer for high-smoke cooking (bacon, fish). |
PickRV editor
Propane stoves heat instantly + reliably — they're the right answer for 95% of RV trips. Induction is FASTER but requires ferrous cookware (your favorite aluminum pan won't work) — buy a magnet, test your existing cookware, plan ahead.
Second: cooking inside a closed RV with propane WITHOUT ventilation = CO buildup over hours. Always run the range-hood fan OR crack a window when cooking. Every RV should have a working CO + propane detector (test monthly).
Third: the outdoor camp stove is the RV-cooking hack nobody volunteers. Keeps cooking smells + smoke + heat OUT of the galley. Particularly important for breakfast bacon + fish + anything fried — your interior fabric stays cleaner + you sleep better. Cost: $40 for a 2-burner Coleman + $10 for a 1-lb propane bottle (refill at any hardware store).

How-to · 5 steps · ≈1 min
Batch cooking — pre-trip prep that wins the week
The single biggest win in RV cooking: cook at home before the trip + freeze portioned meals + reheat in the RV. Skips half the cooking + cleanup during the trip. Works for any recipe that freezes well + reheats well.
- 1
Pre-trip Monday: cook 3 freezer-friendly dinners
Chili (5 quarts), lasagna (1 large), pulled pork (4 lbs). Each = 2-3 family meals. Total kitchen time: 3-4 hours. Equivalent on-the-road time: 9-12 hours saved.
- 2
Portion + vacuum-seal
Vacuum sealer ($60 FoodSaver) + vacuum bags ($20/100). One-meal portions: 1 quart chili, 4 lasagna squares per bag, 1 lb pulled pork. Label + freeze.
- 3
Transport frozen
Pack frozen meals in a cooler with ice for the drive to the RV pickup. They'll thaw partly during the drive, which is fine — they finish thawing in the rig fridge.
- 4
Reheat method per recipe
Soups + chili: pot on the stove, 8-12 minutes. Lasagna: oven 350°F for 40 min from frozen, 25 from thawed. Pulled pork: 10 minutes in a pan with a splash of broth to re-moisten.
- 5
Plan 2 'cook-fresh' nights + 2 'eat-out' nights
Don't try to batch-cook ALL meals. Reserve nights 4 + 5 for fresh-cooked simple meals (tacos + pasta) and one 'eat out at a local diner' as a reset. Avoids prep fatigue.
PickRV editor
Most RV-cooking blogs push 'cook everything fresh' fantasies — which is exhausting by day 4. Pre-cooked frozen meals are the single biggest win that nobody markets (because nobody sells you anything to do it — the equipment is a $60 vacuum sealer you probably already own).
Second: SOME foods don't freeze well — leafy salads, fried foods (lose crispness), heavy-cream dishes (separate), and most rice dishes (get mushy). Stick with stews, casseroles, braised meats, and pasta sauces.
Third: the 'eat out at a local diner' night is the most underrated RV-cooking strategy — gives the cook a break, exposes the family to local culture, and saves 1-2 hours of evening prep + cleanup.
Chapter 4 · Overview · ≈1 min
No-cook meals — when you don't want to cook
Some days, you don't want to cook — you've been driving 8 hours, the kids are hungry NOW, or the AC is broken and the rig is 95°F. The no-cook playbook for breakfast + lunch + 'emergency dinner' keeps the family fed without lighting the stove.
PickRV editor
No-cook breakfast: bagels + cream cheese + fruit + yogurt cups + granola + cold cereal. Total prep: zero. Eat on paper plates, trash the plates. Total cleanup: 30 seconds. No-cook lunch: deli-meat sandwiches OR wraps (tortilla + hummus + veggies + cheese) OR cheese-and-cracker plates with fruit + nuts. 5 minutes prep. No-cook dinner (for emergency days): rotisserie chicken from a grocery store + bagged salad + bread + cheese + fruit = a real meal in 0 cook-time. Or a charcuterie board with deli meats + cheeses + olives + crackers + fruit. Or 'breakfast for dinner' with cold cereal + fruit + yogurt.
Second: store-bought rotisserie chickens ($7-$10 at Costco/grocery) are the secret weapon of RV cooks — 2-3 meals worth of protein, no prep, eat hot OR cold. Pick one up on a grocery stop every 3-4 days.
Third: salad kits (Dole brand or similar, $4-$6 each) are pre-washed + pre-chopped + include dressing — assemble in 90 seconds, eat in 5.
Fourth: 'snack dinner' is a valid family meal once or twice per trip — cheese + crackers + fruit + cold cuts + olives — kids love it, no cooking, no real cleanup.
- No-cook breakfast: bagels + cereal + yogurt (0 cook time, paper plates)
- No-cook lunch: sandwiches + wraps + cheese plates (5 min prep)
- Emergency dinner: rotisserie chicken + salad kit + bread (0 cook time)
- Snack dinner: cheese + crackers + fruit + cold cuts (kids love it)

Overview · ≈1 min
Food storage — when the fridge is too small
RV fridges are SMALL — 4-6 cubic feet typical, vs 18-22 in a residential fridge. Family-of-4 food for a week does NOT fit. Strategies: pantry-friendly foods that don't need refrigeration, daily grocery stops, and exterior coolers for overflow.
PickRV editor
Pantry-stable foods that work for full RV meals: pasta + jarred sauce, rice + canned beans + canned chicken, oatmeal + dried fruit, tortillas + canned refried beans, peanut butter + jelly + bread, canned soups + crackers, dehydrated/freeze-dried meals (Mountain House, AlpineAire — pricey at $8-$12/serving but no fridge needed, prepare with boiling water). Build a pantry box for 50% of your meals; reserve the fridge for fresh items only.
Second: an EXTERIOR cooler (Yeti Tundra 45, $300, or RTIC 45, $200) packed with block ice + drinks lasts 5-7 days. Use it for beverages + condiments + items that can tolerate ice-cold (yogurt, deli meat). Frees up the small RV fridge for cooking-prep items.
Third: shop EVERY 3-4 days, not for the whole week upfront. Most US towns have a grocery store. Buying small + fresh saves space + reduces food-spoilage waste.
Fourth: freezer storage is even MORE limited (often 1 cubic foot) — plan to thaw frozen meals 24 hrs in advance in the fridge.
- Build a pantry box for 50% of meals (no fridge needed)
- Exterior cooler ($200-$300) for beverages + overflow
- Shop every 3-4 days, not for the whole week upfront
- Freezer is 1 cubic ft — thaw meals 24 hrs ahead in fridge
Chapter 6 · How-to · 5 steps · ≈2 min
Dishes + water budget — the constraint nobody anticipates
Dishwashing in an RV consumes water faster than any other activity — and your greywater tank fills up. Family of 4 generates ~5-8 gallons/day of dishwater under normal use. With 30 gallons of greywater capacity, that's 4-6 days max before you must dump. The discipline: paper plates for breakfast + lunch, real dishes for dinner only, and a 3-pan washing technique.
- 1
Use paper plates + plastic utensils for breakfast + lunch
Trash the dishes, no washing. Saves ~3 gallons/day of dishwater + 15-20 minutes of washing time.
- 2
Pre-scrape dishes outside before washing
Use a rubber spatula to scrape food residue into the trash BEFORE the sink. Keeps food bits out of the greywater tank (prevents clogs + smells).
- 3
Wash with the 3-pan technique
Pan 1: hot water + dish soap (scrub). Pan 2: hot water (rinse). Pan 3: hot water + 1 tsp bleach (sanitize for 30 sec). Drain each pan into the sink one at a time. Uses ~2 gallons total vs ~6 gallons of running-water washing.
- 4
Air-dry on a dish rack
Don't towel-dry — air-drying is more sanitary + saves towel laundry. A folding rack ($15) fits in galley between meals.
- 5
Catch greywater for toilet flushes when boondocking
Place a small bucket in the sink while rinsing — capture rinse water. Use for bucket-flushing the toilet, saving fresh tank water for drinking. Only relevant when boondocking + tank conservation is critical.
PickRV editor
RV-cooking blogs almost never discuss the WATER cost of cooking — but it's the constraint that ends boondock trips early. The 3-pan washing technique cuts water use by 60-70% vs running-water washing and is the #1 most important conservation habit.
Second: 'gray-water tank stink' on day 4-5 of a trip is almost always from food bits + grease in the tank — pre-scrape dishes religiously, and pour 1 cup white vinegar + 1 cup boiling water down the kitchen drain weekly.
Third: dishwashing in cold water (when the water heater is off) — bad idea. Cold water doesn't dissolve grease + leaves residue on dishes; grease then accumulates in the greywater tank + makes the smell + clogs worse. Always wash with hot water, even if it costs more propane.
Continue reading
More trips like this · 6
Similar terrain, seasons, and rigs from across PickRV.
Was this guide helpful?